If you have tried anything on this site please leave a comment and let me know.

The more I hear from you the better! I love hearing how these activities are working in your home/daycare or nursery!
I get lots of emails about what you are doing, just leave a comment so everyone can read it too!


Monday, October 11, 2010

Secondary Colors - Toddler Activity #1

It was my turn for Tot School this week.  Everyday I will post what we did for you to do with your 2.5-3 year old.  If you want my tot school schedule email me and I will send it to you! :)

Last week they worked on Primary Colors. I was pleased that they knew the 3 they worked on so it was time to learn the next 3.

I downloaded this Catch a Rainbow observation chart from KidZone.  I printed it on Graph Paper for full effect! :)

Then I filled a bowl of milk and added food coloring red, blue and yellow to the milk.  I used milk because it showed the colors better than water would have.
 Then we observed it.
 Then we filled in the first circle with what we saw.
The kids were so good and coloring everything just as they saw it. Cute!
 Then I stirred it with a wooden stick.
 They thought this was neat. Then we colored what we saw after the stirring.
During snack I asked each person what we did and what we saw.  I loved that 4 of the kids said that we made a mess in the bowl. Hahaha.

Friday, October 8, 2010

Witches Brooms

I know you were totally waiting for another awesome Toddler Halloween Snack idea right?

Here is one more to finish our week.

You need 1 string cheese cut into 3 parts, licorice strings, and 3 pretzel sticks.
 Start by peeling up the cheese half way.
 Once my kids saw how to do it, they jumped right in!
 It should look like this...
 Then you stick the pretzel down the other end...
Then add the licorice.
Then enjoy!

If you like these snack ideas or want to see more...please leave a comment and I will make sure to add them into my weeks! :)


Wednesday, October 6, 2010

Monster Munch

Another fun Halloween snack.  My son is in charge of the snack and on his day its monster day, which we will do on Halloween week. :)

Anyway here is my creation of MONSTER MUNCH! Aaah! Monster Munch is what Monsters eat-not monster parts. :)
Here is what I used: 
Honey Nut Cheerios (people eyes)
Vanilla Goldfish (dead fish)
Raisins (bug eyes)
Sunflower Seeds (mouse toes)
Sweedish Fish (baby tongues)
Chow Mein Noodles (dried up worms)
Cocoa Puffs-not pictured but used (mouse poop)

Totally gross, but fun.
I let them create their own mix and for my son's class I made a chart and let them see and read what was in their individual snack sized ziploc bags.   
 Then it was time to eat.
And discover what each thing was.  It was a fun activity. Try it instead of candy! 

Tuesday, October 5, 2010

Fun Halloween Snack

I couldn't resist making my kids something fun for snack.

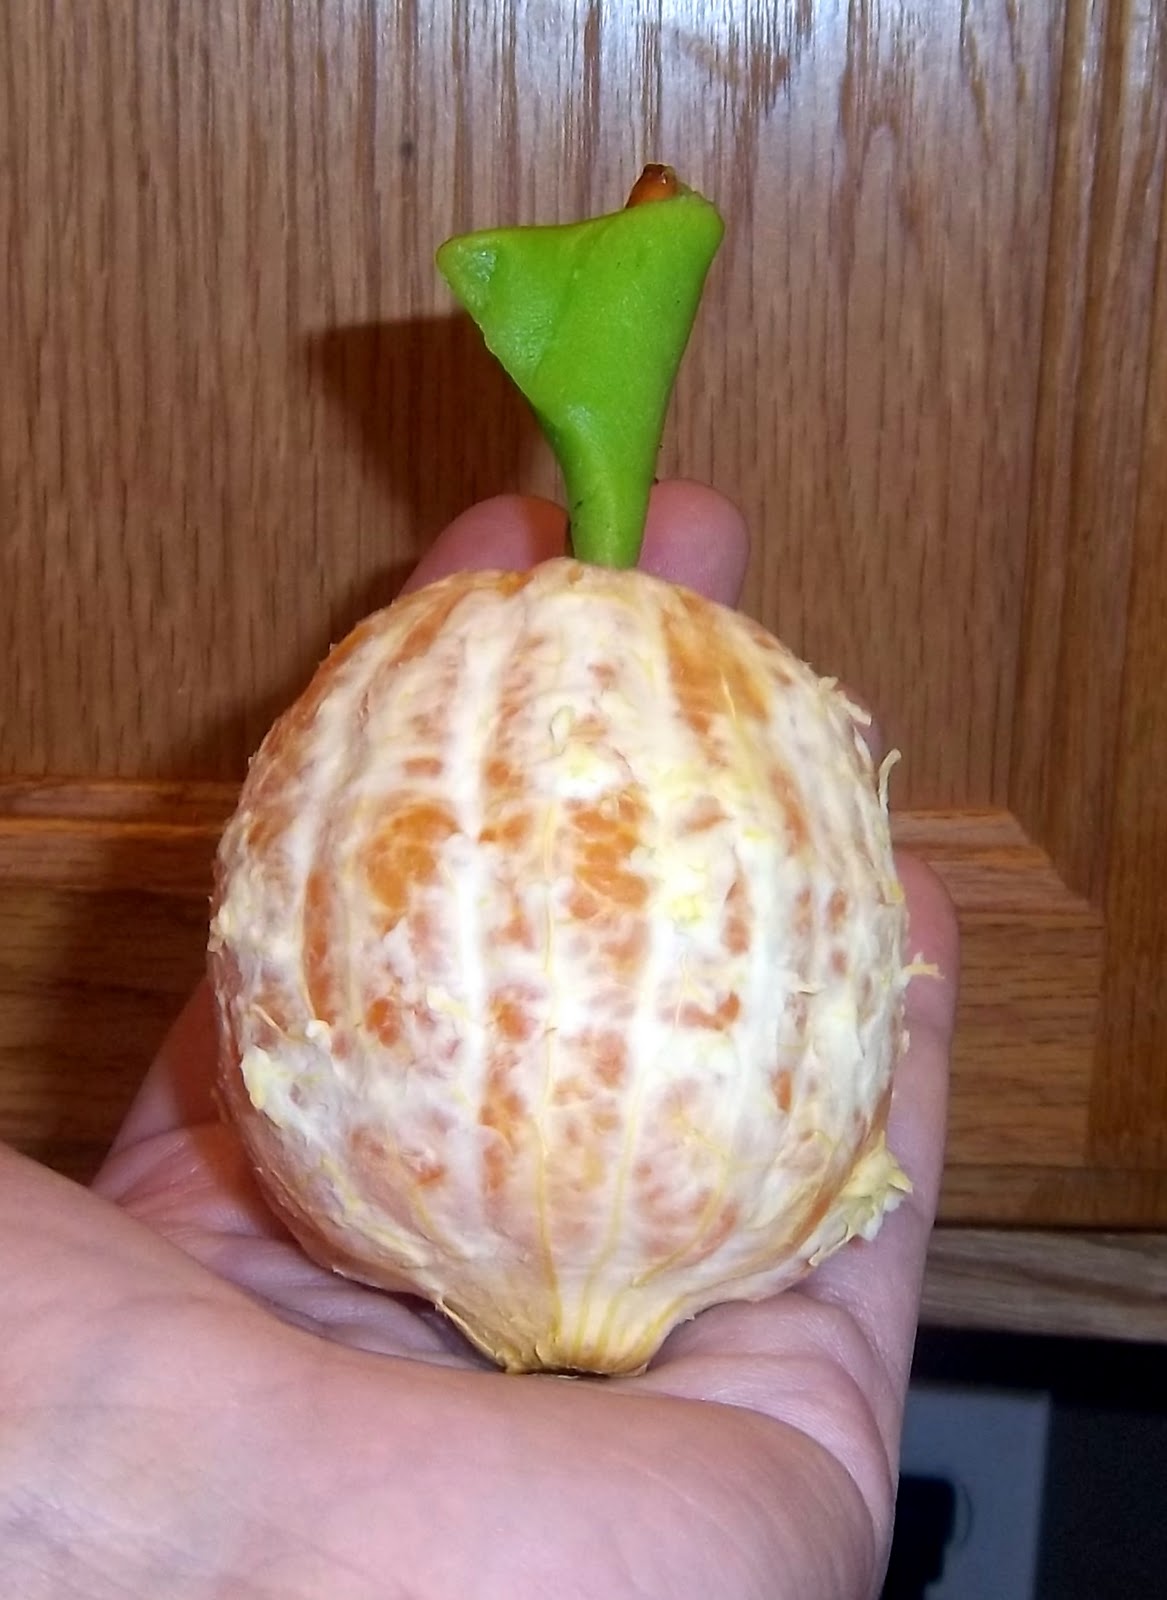
You need an orange, a pretzel stick and a green airhead. Shown here...
Cut the airhead into a large triangle and then wrap around the pretzel. Stick it into the peeled orange.
Look! A pumpkin!  We added dried spiced cloves after this to make the eyes nose and mouth.

 
 But before we could do that we had to eat the candy! Haha.

It was a fun after school snack to get us into the Halloween Spirit!

Friday, October 1, 2010

Making Ketchup

Or chech-up as my 18 month old calls it.  We were having Corn Dogs for lunch and my 4 year old asks how do you make ketchup?

I asked him how he thought it was made and he said just mash up some tomatoes?  So we tried it.
We pulled tomatoes from the garden and bagged them...
 and smashed them.


then we read the ingredients and made our own.
 The real stuff is in the pink bowl.


  My kids liked their version so much that is what they dipped their lunch in. :)
Nothing amazing, just something fun.

Tuesday, September 28, 2010

Straw Sculptures

You need straws and scissors.
Cut slits on the ends and then start to build.
The unslit sides fit into the slit sides.
Cutting and building.
SMILE!
This is serious stuff!  We had a fun time and were building for 45 minutes.
When you are done, keep the straws I have another project for this next week!
Just bag it and label it...project straws!

Monday, September 27, 2010

Romaine Prints

Sorry about last week, I had enrichment, 2 birthdays a new niece and my husband worked a 20 hour shift!

So here we are with our fun project.
Save the ends of your Romaine Heads...and leave them out overnight so they dry out.
You get a better print since they are wet. Also use these craft paint because its thicker and works the best on butcher paper.
Then stamp away. We practiced on paper and then went directly to butcher paper.
Let it dry for 24 hours.
Then wrap your present!
Here is the back.

My sister was the recipient of this particular gift and she liked the paper so much! 
Its an original work of art!
If you wanted to be GREEN you could do it on Brown Paper Bags!

this content is copyrighted NO RIGHT CLICK!

..

Protected by CopyrightSpot MyFreeCopyright.com Registered & Protected